
Last fall, I fell in love with marquees. Maybe it was because it was the trendy thing to do. Maybe it was because everyone was trying to find one and they were flying off the shelves and it was the thrill of the hunt. It seemed that everyone who was anyone has snagged a JOY marquee from Target.
One day, I found one. YES!!!!!
A few weeks ago, I happened to walk down the Christmas isles at Target and here was this beauty...
LOVE...

...and I loved it so much, I brought it home.

But, you know I couldn't just leave it alone...it needed a makeover to be more "me." I took the globes and lights off the metal letters. Then I snagged a pallet from our basement. It was part of our storage system... I was counting on the fact that Mike loves me so much, he wouldn't care if I stole part of his storage system. Haha!
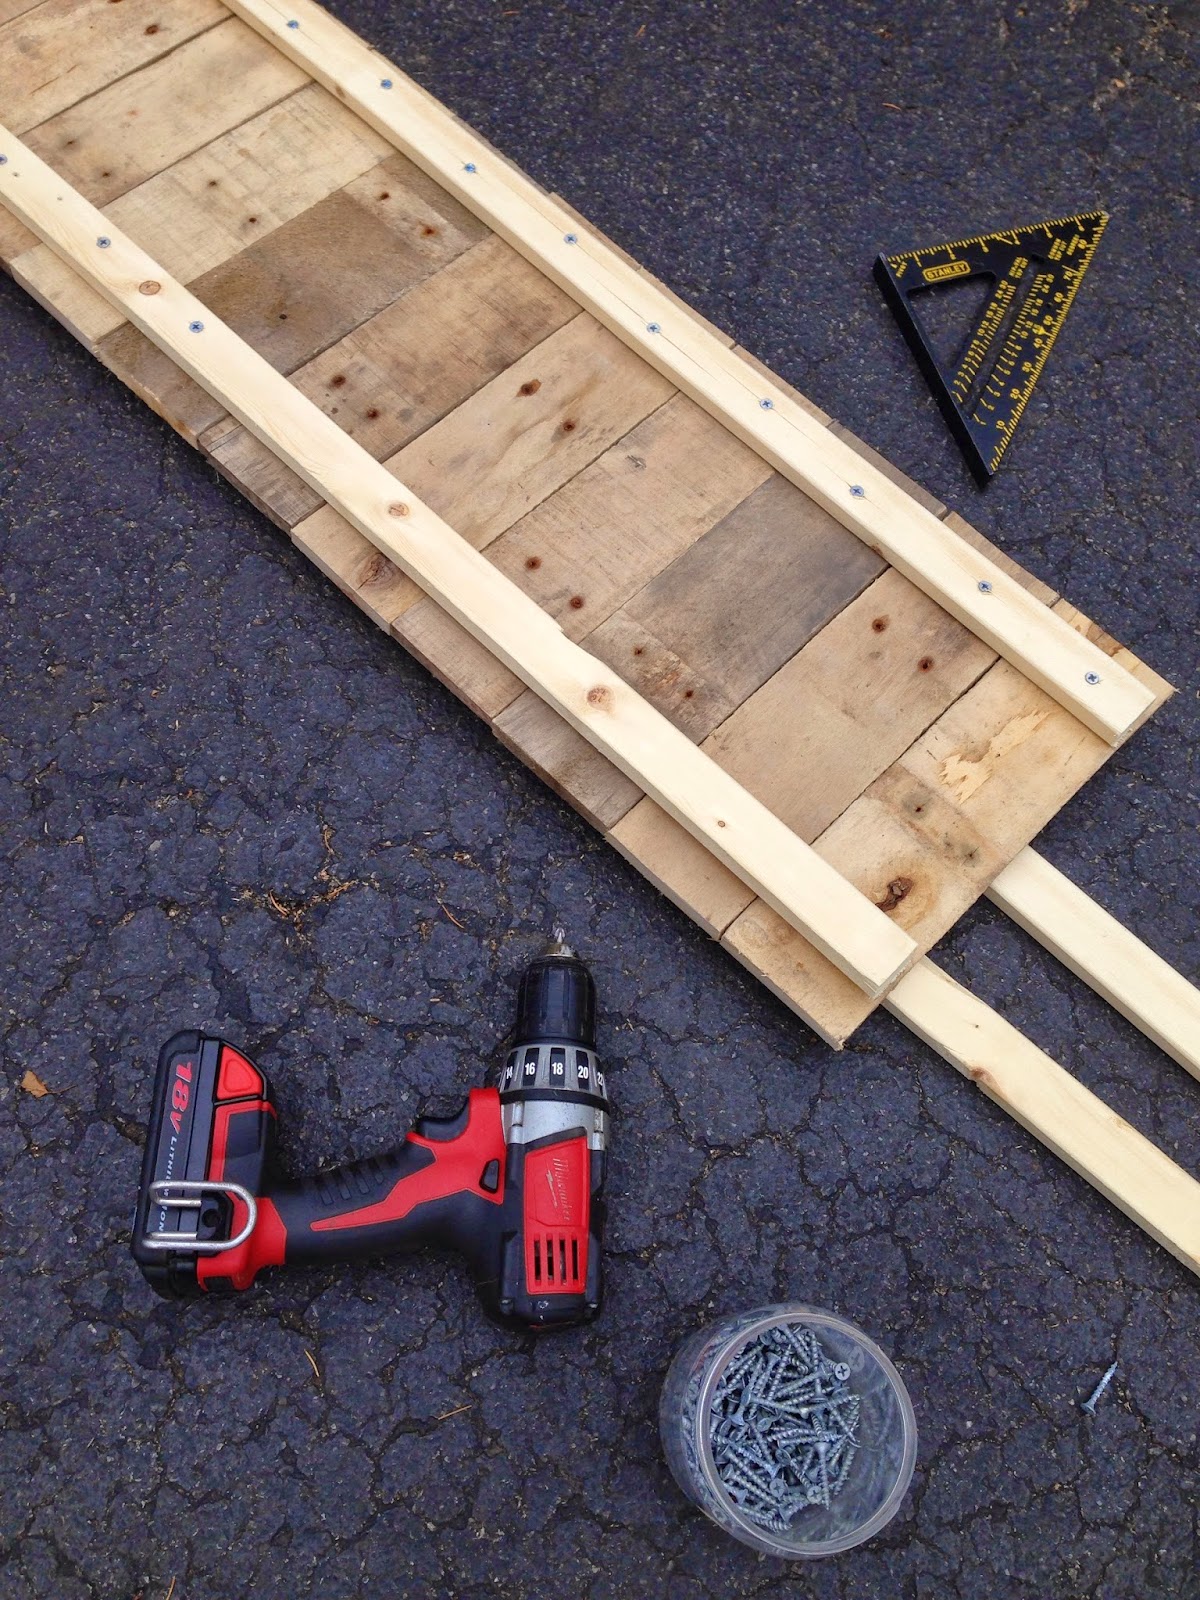

I knew I wanted the letters to hang vertically and the pallet boards weren't long enough to just place several next to each other. I had to cut each board to 12" and place those horizontally to fit the length I needed. (about 4 & 1/2 ft.).
Have you ever taken apart a pallet? It's hard. Mike helped me whack it apart. He also helped me with the chop saw. Someday I'm gonna learn how to run that baby!

I bought 1" x 2" pine boards to mount the pallet boards onto. I was told that if I had pre-drilled my holes, the pine wouldn't have split. But, seriously, I didn't have time for that. And I take shortcuts. Sometimes that works in my favor; sometimes it doesn't. This time I think it's fine because the pine doesn't show at all. I prevented the whole board from splitting by staggering the placement of the screws. I used 1 & 1/4" flat head screws for this part.

After the boards were attached together, I sanded the top and sides a bit to smooth the cut edges, but also to "clean" the boards a bit. They has quite a bit of dust and gunk on them from years in our basement.

I love the rustic, uneven, random rusty screw holed look.

Next...it was time to makeover the letters. Last year, I had seen several people paint their letters, use glitter, etc. but I am a fabric lover through and through. I have an amazing stash and I knew that adding fabric was the way I needed to make the marquee reflect me.
I used a vintage curtain panel for my fabric. Part of the reason for using this fabric is because I hope to hang the marquee right next to a grouping of family pictures we just had taken in October. I made the cutest little tie for Silas out of this yellow fabric. It'll be a nice way to echo that fabric print next to our photos!
I rough cut the fabric around the letters. I adhered the fabric with one layer of modge podge and let that dry overnight. Next, I trimmed the fabric using an exacto knife, a rotary cutter, and fine tipped scissors. And patience. I didn't think it would be so challenging to trim around each of the letters. I did not trim the holes for the lights/globes.
After trimming all the edges, I painted another layer of modge podge on top of the fabric. I suppose you could leave this step off, but I wanted to make my fabric more durable since it'll hang in a busy area of our home. Plus, I figured it'd be easier to dust...if I dusted. Ha!

The second coat of modge podge dried over night. I used my exacto knife to cut an X in each hole to insert the light and globe again.
It took one episode of White Collar to put the globes and lights back in the metal letters. (Do you watch White Collar? No?! It's hubby's and my show...and we're almost out of Netflix episodes...insert frowny face.)

SOOOOO, as I was putting it back together, I realized that the cord for plugging it in was at the top of the marquee. Ack! About 4 feet too short to reach my outlet. It's how the wiring was designed and there wasn't a way to switch it around. So, for a moment, I had a panic attack and thought I'd have to become an electrician or bribe an electrician I know, but then common sense kicked in. I realized that there would be room behind the pallet for hiding an extension cord. Remember I mounted the pallet boards on a 1" x 2" board? Perfect solution! All I needed to do is gather the excess cord and tape it up so all that hangs out from the bottom of the pallet is the length needed to plug it in.

The next morning, I used long nails to hang the letters on the board. My two littlest cuties were fascinated with the lights. It was quite pretty given the grey, rainy morning. We turned off all the other lights in the room and they sat in front of it eating their breakfast. So sweet!

I still haven't hung this up yet. I need my hubby's help to drill and pound in an anchor in the wall. It's a bit heavy. But it's gorgeous. And fabulous.
And I love it!!!


You can see above that the wires have a mind of their own. I used a little tape to secure the loose bits to the backs of the letters so they wouldn't show. There is a teeny bit of wire that is visible between the letters but that can't be helped.

It's just propped up against the wall right now. And this isn't even the wall it's gonna be hung on. It was just the wall with the best light. Ha!

Have a blessed day, friends!!!
3 comments:
you are nothing short of amazing! LOVE
I LOVE this!!!! I got the JOY for my birthday, then went back and got the heart. I may borrow this idea for the heart. You are so creative!
Hello, Kiley! I love your blog, and your creativeness always inspires me; our mutal love of colors makes me happy! So, I've nominated you for the Sisterhood of the World Blogger Award. You can check it out on my blog here: http://clarajaneseamstressandsupplies.blogspot.com/2015/06/sisterhood-of-world-bloggers-award.html
Post a Comment