Showing posts with label Vintage Sheets. Show all posts

Tuesday, January 8, 2013

Vintage Sheet Lamp Shade

 
I've been on a project kick over the past few weeks!  It feels so satisfying to be creative and make our home cozy and fun!
 
I love the idea of taking common items and altering them to be unique to my home. 
 
I could have a boring, white lampshade (from Target) but why would I want to do that when I could have a colorful shade covered in a vintage sheet remnant?!
 
 
Gather a few crafting supplies and a lovely vintage sheet.
 
 
After trimming the fabric to the approximate size I needed, I used basting spray to help the fabric stick to the shade.
 
 
I rolled the shade along the fabric, pressing any bubbles out as I rolled.
 
 
Trim the fabric about 1/2 inch bigger than your shade.
 
 
Fold the cut edge under for a finished edge on the outside of the shade and hot glue it down (see the top of the picture where the fabric pattern doesn't match up).  Turn the trimmed edges to the inside of the shade using hot glue to keep it in place.  I hot glued ribbon inside the top and bottom edge of the shade to hide the unfinished fabric edge and make it look prettier. 
 
 
Secure the lamp shade back on your lamp and sit back and enjoy!
 
The funny thing...I really like the lamp base and the covered shade in the evening with the light on, but not so much during the daytime.  I'm thinking I might switch up some shades in my house and cover a different shade for this lamp base. 
 
Hey, it's only one more project to add to my always growing list...grin!

Saturday, December 22, 2012

Vintage Sheet Blankie

For the past several years I've intended to make more effort to give handmade gifts.  I usually end up with only a few.  If I started those projects earlier than the week before Christmas, I'd surely be more successful!  Oh, well...
 
I have just one handmade gift to give and it's for my littlest man, Si-guy.  At least I have a "better" excuse this year...a 10 week old lovie boy.  And so, in true Kiley-Christmas-fashion, I thought of and started this project just two days ago.  I wasn't sure exactly what I would make but I've been dying to cut into my vintage sheet stash so I dug out blues and greens - but no florals!  My other goal was to use what I all ready had on hand...a "free" project!
 
 
I knew I wanted to put his name on the project.  I knew I wanted this project to be really special because, quite honestly, we aren't purchasing Christmas gifts for him this year.  I did pick up a like-new wooden bead toy for him at the thrift store but other than that he's going to simply enjoy the gift of love and snuggles from everyone.  Is that horrible?!
 

It turns out, once I got started, there was a soft snuggly blankie just dying to be created!  I LOVE it!!!  I choose a wonky (or liberated, if you prefer...) log cabin block.  I've never made this quilt block on this scale before.  It was quick and easy to piece together.  And, if you've read any of my other sewing posts, you know that I really prefer the creative process of not using a pattern.  I love figuring things out and seeing how projects evolve through the process - not being bound by the rules and restrictions of following patterns.


I completed the top and simply quilted minky dot fabric to the backside of the quilt top - no batting in between the layers.  It's light feeling, but still has some weight and warmth.  I cut the minky fabric about an inch bigger than the quilt top and in the end, decided to tuck and fold the minky over to the front as the binding after trimming it a bit.  A zig-zag stitch finished it off so nicely.  The edge is a bit "bumpy" due to the dots on the minky.  I would imagine plain minky would not create bumps like this.  Completing the binding this way probably saved me a day's work rather than adding a traditional quilt binding.  Easy peasy!


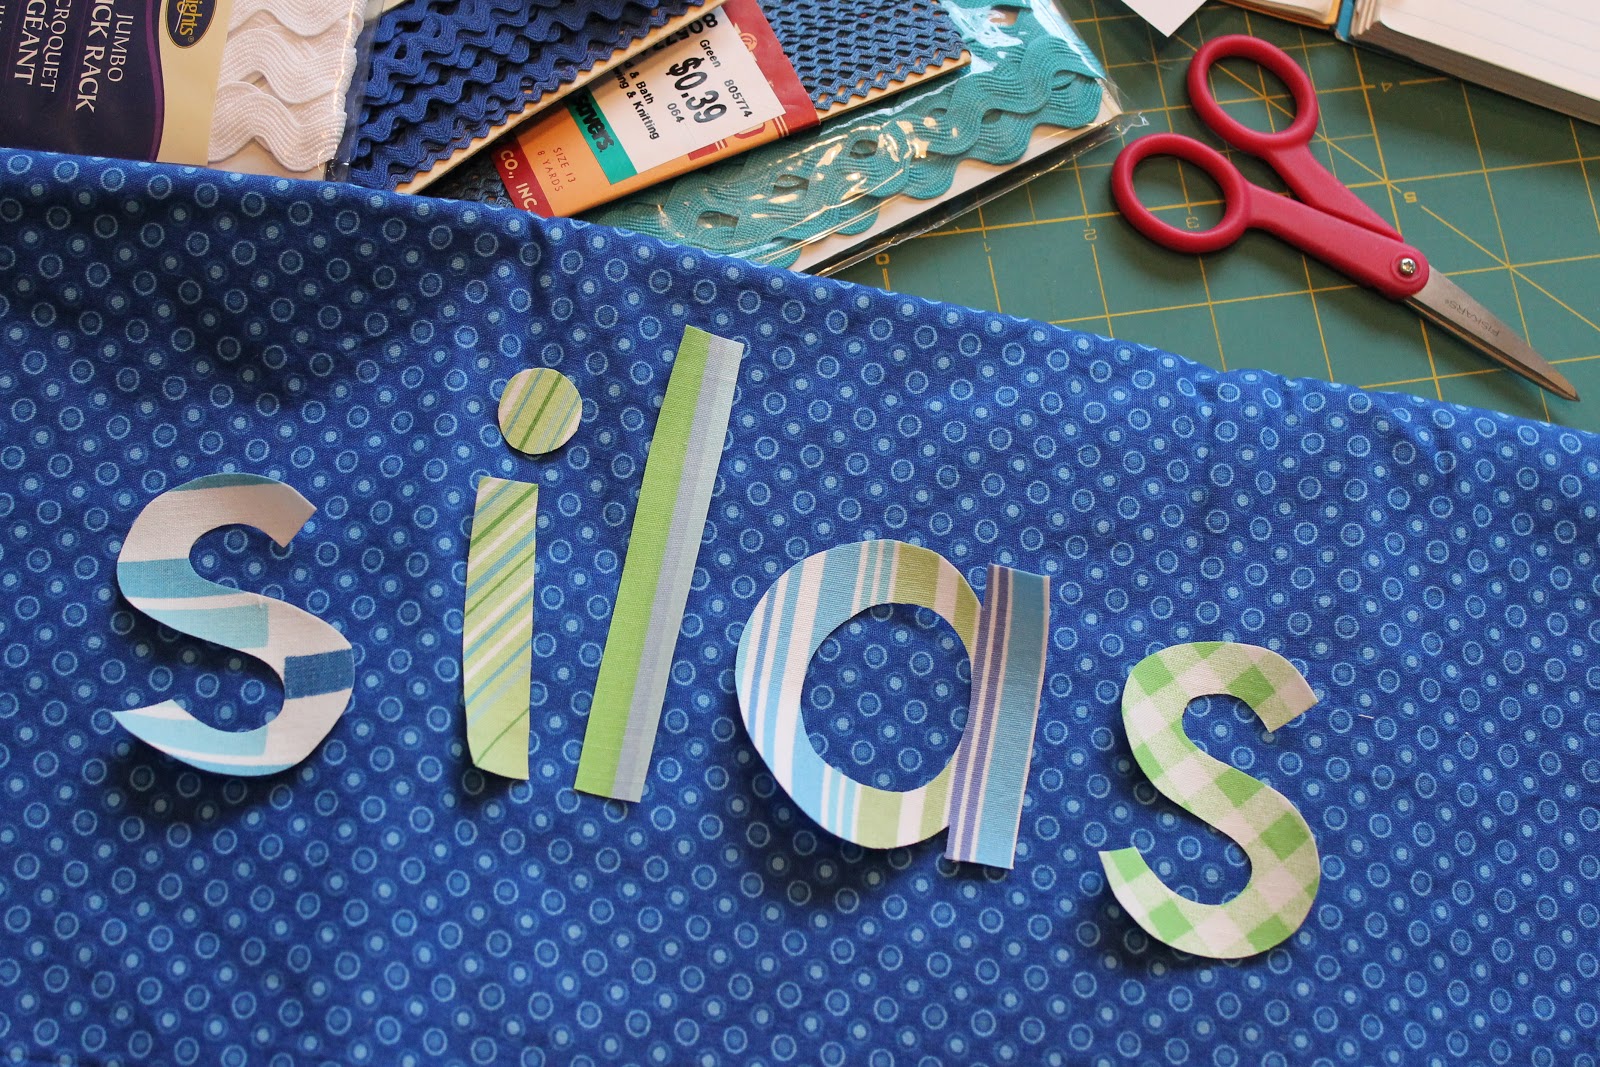
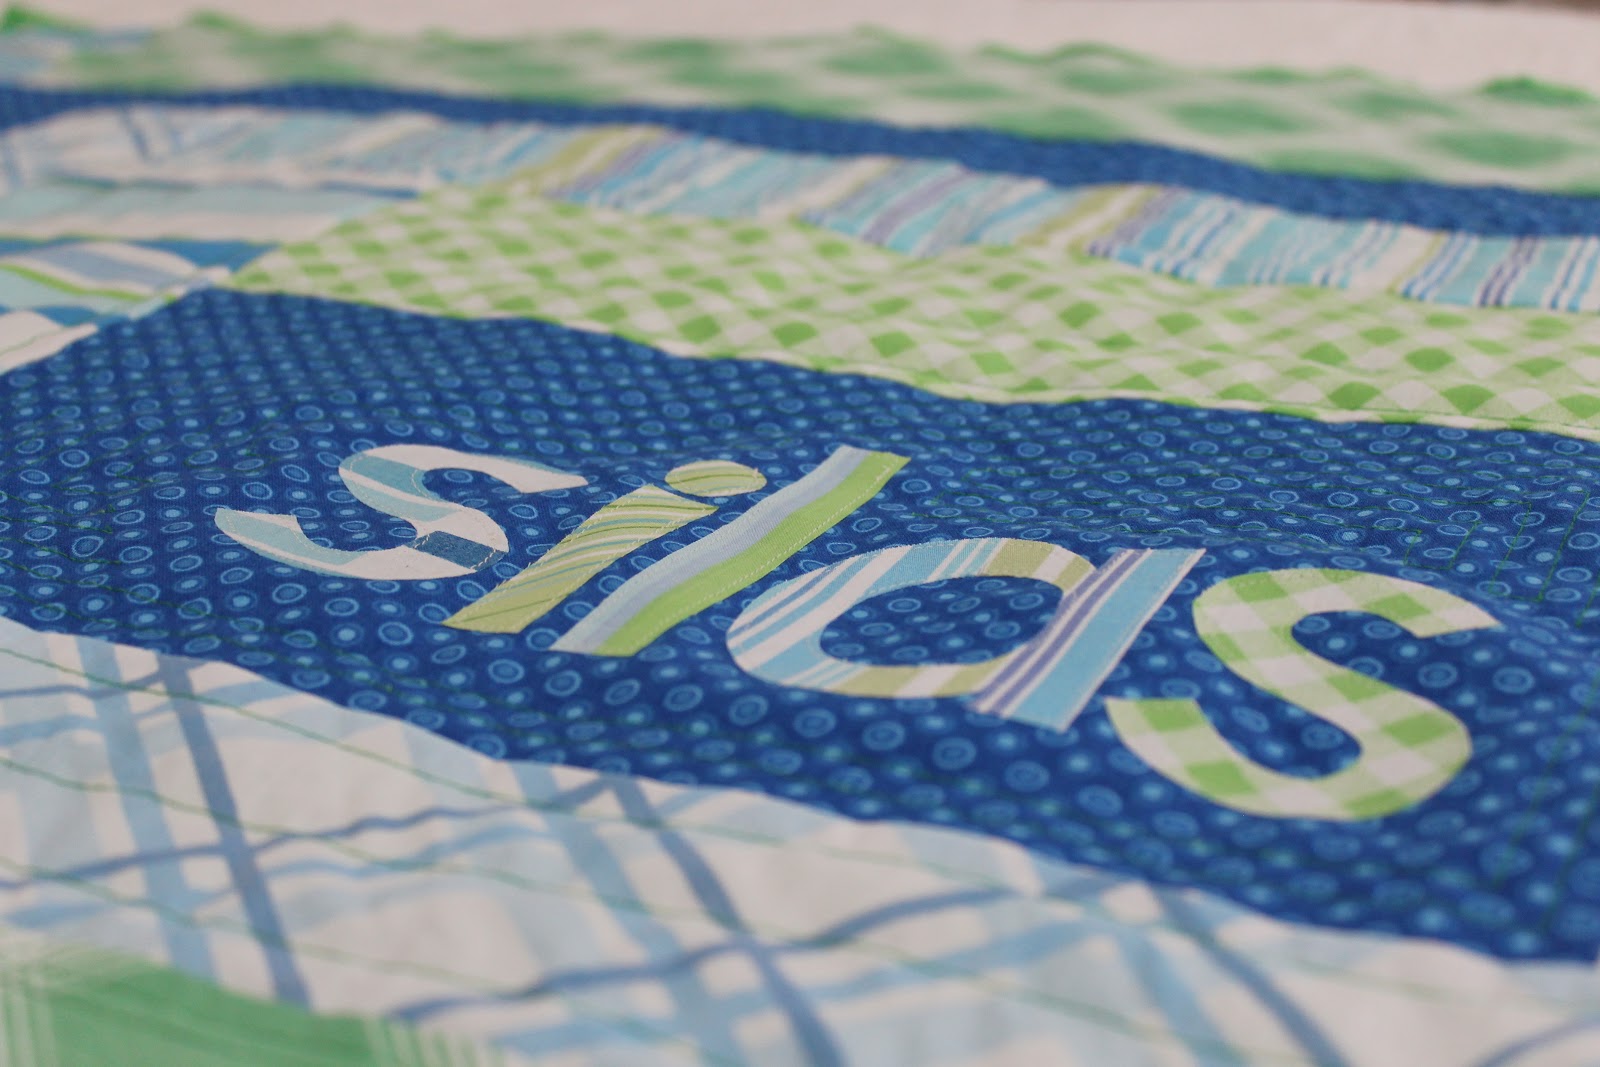
I used fusible web to attach his name with a simple straight stitch to tack it down permanently.  I assume the edges will fray a bit but I'm okay with that!


Won't these colors be so perfect for Silas' room makeover this winter?!  My color scheme is based on maps, globes, and vintage children's geography puzzles...


Hwin approves!  Silly kitty kept sneaking into my pictures!


I've been wanting to branch out a bit from my doll making and find a few new items to make and sell via etsy using vintage sheets...I might be onto something here!
 
Either way, I think I've got a great idea for handmade baby gifts in the future!
 
Christmas Blessings to you and yours!

Saturday, September 22, 2012

Rise & Shine

I've been busy working on some fun projects over the past few weeks.  Today, I finally paired together this sweet print from Katie Daisy, a vintage sheet, and a thrifted frame my awesome husband painted for me. (He was already painting our coffee table this color anyhow!  LOVE this yellow and LOVE my coffee table!  I should post a picture of that some time, huh?!)


So bright and cheerful!

 
To keep the fabric from shifting, I used tiny dots of hot glue at the very edge of the backing board and two small pieces of double stick tape to attach the print to the fabric.  With the fabric, the backing board fits quite snugly in the frame so I don't expect any of it to shift!
 
Can't wait to get it on the wall in our half bath along with some other items!


Friday, October 7, 2011

Teddy Bear Sleeping Bag

I saw a super cute sleeping bag for lovies on Pinterest (another new addiction! aaahhhhh!) and I just had to make one! You can purchase your own pattern from Flossie Teacakes, too! I'm definitely going to make more and have a dolly slumber party!


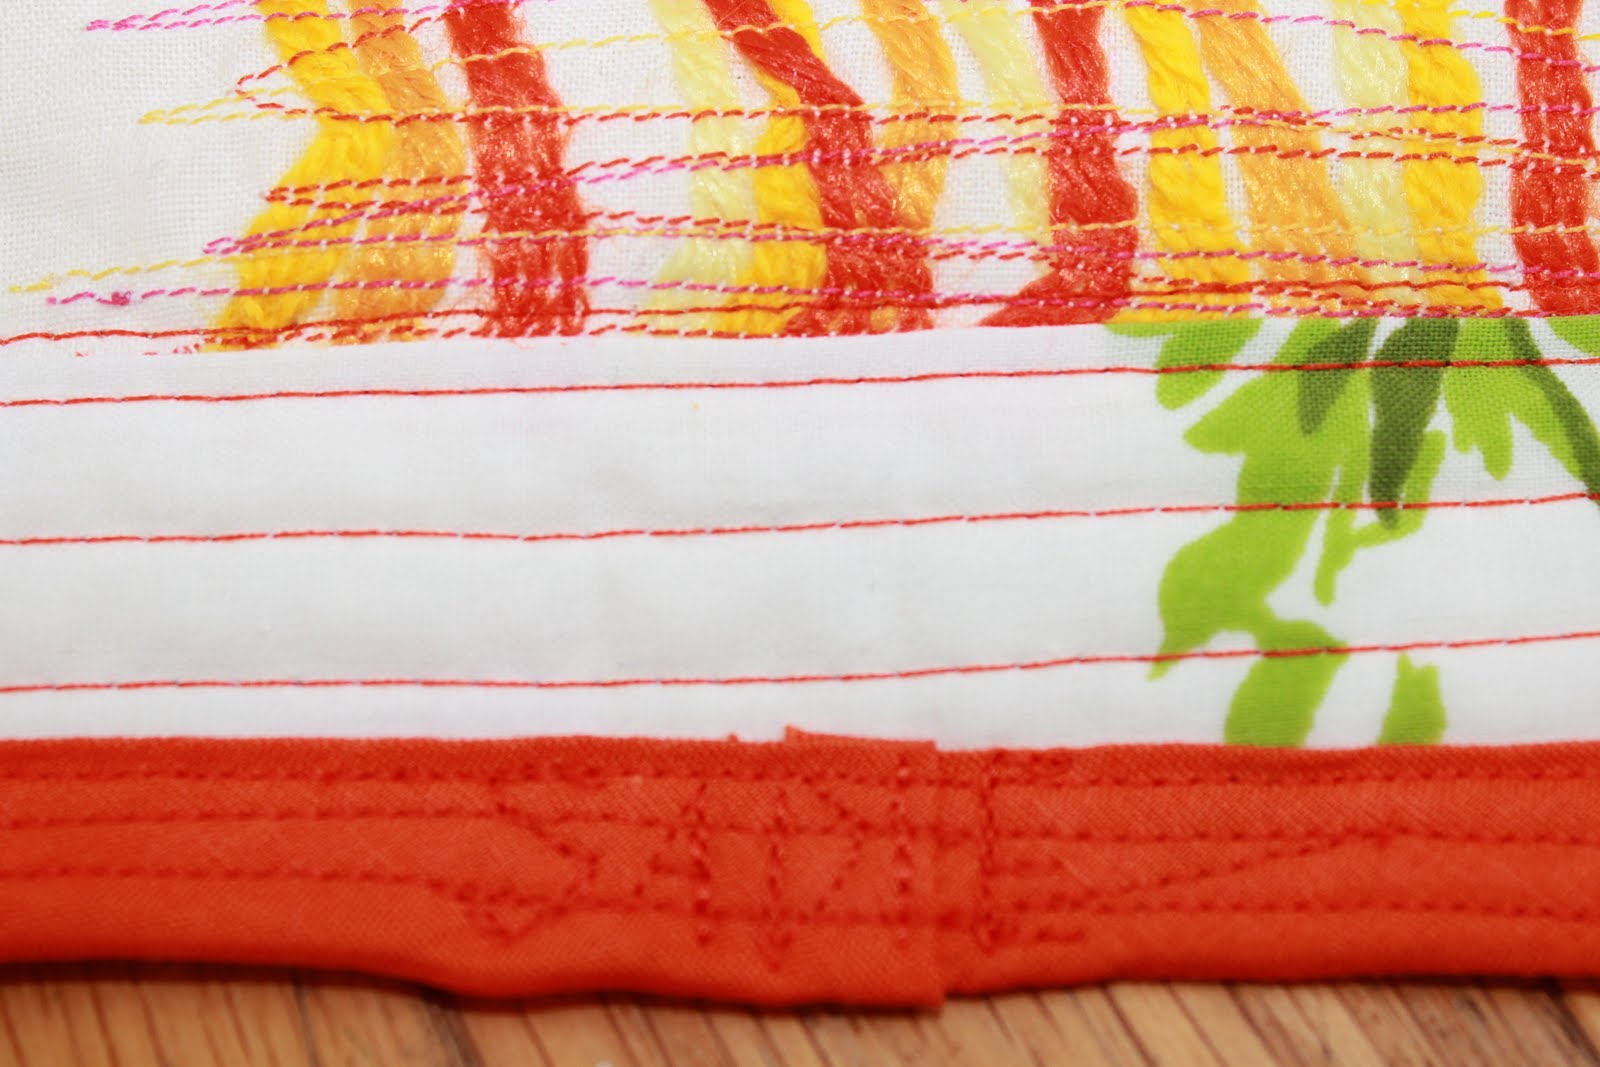
I saw this idea (guess where???) to sew lengths of yarn on a piece of fabric...thought it was kinda cool looking. I tried it with thrifted yarn on a scrap piece of muslin and it turned out pretty sweet. It was the perfect size to use on the sleeping bag cover...a small quilt block of sorts.


The rest of the fabrics came from my vintage sheet stash & scraps. The orange double fold binding was thrifted as well and not a little tricky...a LOT tricky...to curve around the rounded corners. Loving those bright, citrus colors! Who wouldn't wanna sleep in this fresh squeezed bedding?!


I tried to sew Sadie's name in the bottom of the sleeping bag...hmm...maybe next time I'd try hand embroidering it.


The finished sleeping bag. I made the daddy bear size (also included in the pattern is the baby bear and mama bear sizes.) Super fun!


Sometimes my mind needs a different creative break! This weekend I'll be focusing on getting more doll orders finished...amazed and up to my eyeballs in orders!

Friday, July 29, 2011

Scrappy Wonky Vintage Sheet Pillow and the Sewing Saga

I keep promising myself that I won't start any more sewing projects until after we move but I can't seem to bring myself to actually pack up my sewing machine and notions. In all fairness to my children, my "toys" should be packed just as most of theirs are...maybe after this weekend, I'll pack it all up.


But it'll make me cry.


Seriously.


Since last October, I've worked on sewing projects about four days a week...and I love every minute of it! And, the dolls...so stinkin' cute and I still love making them...


It kind of feels like once my machine is packed, it'll be forever before I can justify any type of sewing...priorities, right?! Sorting, packing, and moving from our old home, unpacking and settling into a new home, packing and food shopping for vacation, going on a week long vacation six days after we move, unpacking from vacation, still unpacking in our new home, somehow establishing a homeschool routine in a new house that is still not unpacked...phew...when will I ever sew again?! Doesn't that seem like forever to you, too?!


Ah, well...I will make it. I will survive. I will sew again!!! And while I'm waiting, I'll gaze at my new pillow. Ain't she perty?! She is not being packed unless you count riding along in my van on moving day with my sewing machine and my body pillow (can't kick the pregnancy habit...it's only been two years...ahem...she's so soft and cuddly and props my legs in the most comfortable way). Yes, these items will be lovingly seat belted into the front seat. My machine has already called "shotgun!"


I made this pillow from vintage bed sheet scraps. I had some scraps of my own but I also purchased a scrap pack from this lovely gal. I saw the idea for this quilt block here...


I used a fat quarter I had received in a swap a few months back for the backing. And since I didn't have a pillow form and couldn't stand not posting this any longer, I folded up a sheet to fill the pillow for now!


Certainly a bright spot of color in all the chaos to come...

Tuesday, May 24, 2011

Vintage Sheet Swap

I'm participating in my first ever online swap! It's sheet swapping time!

40 fat quarters, generously ripped to at least 20"x24" each, are being shipped out today all the way to Washington state! I should receive 40 different fat quarters back by mid to late June.

Have you ever ripped fabric?! I was nervous to do it, but after reading several "tutorials" I tried ripping my first sheet. It isn't difficult, but I've always been a rotary cutter & large ruler kinda gal... Now THIS is the way to handle Mt. Yardage, for sure!!! At least once it's ripped to more manageable, rotary cutter mat sized pieces.

I requested a few more blues and purples if they are available! Excited to get my box back!!!

Thursday, May 5, 2011

Thrifty Thursday

Our stops at the thrift store were a smashing success today! I say "our" because my boys are starting to get into this thrifting thing...they no longer say in Eeyore voices "Bow-ring" when I suggest stopping by my favorite haunts for a quick scour. He, he!!!

Luke found this terrific "spy notebook" for...well, you know...7 yr. old spying adventures...(can't believe he's gonna be 7 yrs. old in just a few weeks!!!) ($0.99)


Luke's spy and discovery book...

Each of these sections are envelopes for your "valuable papers."


Went garage saleing (saling, sailing, sale-ing???) with a friend and scored the larger suitcase ($10) formerly belonging to Mr. Edwin L. Mincher (may he rest in peace). The sellers were like, "Awww...she's buying Ed's suitcase...he was a good fella!" I say he had great style, too...the inside is lined with tan & cream herringbone fabric. So old man-ish. So perfect.

The smaller suitcase came from another garage sale on another day...($5).

Both need to be cleaned. I think goo-be-gone might remove Ed's white address labels...I hope!


Brand new Twister game cellophane wrapped and all ($2.49), Five Little Peppers and How They Grew...the boys loved this book and one of them spotted in on the shelf! ($0.99), vintage arithmetic flash cards ($0.49 each) - the boys were practicing with them tonight...but the part I love the most is the picture below.


"Printed With Special Eye-Saving Ink"

Me to my boys, "See, boys! These are secret SPY math cards...SPECIAL INK...it can SAVE things like eyes! Now study, study, study!!! Save the WORLD with ARITHMETIC!"


Oh, the vintage sheets...sigh! "Hello, My name is Kiley and I'm addicted to vintage sheets..."


Gorgeous vintage table cloth...perfect condition! ($3.49)

Not pictured but worth mentioning...rain boots for Ike ($1.99). We've been looking for new ones!!! Also, from garage sales and the thrift store today...FRAMES!!! Working on a project with them! Go here for a sneak peak!!!


I'm linking up here...


Apron Thrift Girl