Showing posts with label Thrifted. Show all posts

Friday, February 15, 2013

{Homeschool} Learning Board

 I am so thankful to have a dedicated spot for our school area in our family room.  It's not a separate room in our home but I'm not sure I'd want that anyhow.  I like that I can be in our kitchen or living room and still see what's happening with everyone.  Our school area is a great place to work and leave books, projects, etc. out when we move onto something else...like meals.  Do you know how much I appreciate not needing to clear our table every time I serve a meal?! 
 
 
Because we have a school area, I'm getting on board with the idea of having "schoolish" type things hanging on the walls.  In the past I've been totally opposed to that idea but there are some things that we need to review every day.  It is much easier to simply glance at our new learning board than it is to pull out a binder full of review pages.
 
I thrifted the cork board (and really, really nice wooden) frame ($4) and covered it with wrapping paper to hide the many, many pin holes in the matte board.  I photocopied items from Isaac's Saxon 1 Math books that we need to review every day and put it all together on the board.


Typical school day...doesn't it look so idyllic?!  Ha, ha!
 
We do have our shining moments like this.  And then we have our not-so-shiney moments, too!


Isaac wanted to teach Sadie the ABC's.  I love these large foam letters better than any other ABC manipulative we've tried.  I picked them up at The Dollar General several years ago for $1 per package.  Each package had 26 letters and I must have purchased five or six packages.  They are lightweight, colorful, store easily, and have held up really well.


Here's Isaac's (almost) finished board waiting to be hung on the wall.  I need to add his birthday, our address, and phone number.  I still have space to add other items and will change things around as needed.  So far, it has proven to be very handy! 

As a bonus, this board has added a touch of color in this room.  It's just what we needed in so many ways!

Tuesday, February 5, 2013

{Project 365} Day 29: Aqua Scarf

I'm kinda digging scarves right now.  This one is a thrifted, square old lady scarf folded into a triangle with two ends tied together like a cowboy's handkerchief.  He, he!  It still had the paper label attached with its vintage print but no date.  Just goes to show that all things come back again...take a look at that aqua color.  Gorgeous!
 
 
{Project365}: capturing this life - one photo (or so) every day for one year

Tuesday, January 8, 2013

Vintage Sheet Lamp Shade

 
I've been on a project kick over the past few weeks!  It feels so satisfying to be creative and make our home cozy and fun!
 
I love the idea of taking common items and altering them to be unique to my home. 
 
I could have a boring, white lampshade (from Target) but why would I want to do that when I could have a colorful shade covered in a vintage sheet remnant?!
 
 
Gather a few crafting supplies and a lovely vintage sheet.
 
 
After trimming the fabric to the approximate size I needed, I used basting spray to help the fabric stick to the shade.
 
 
I rolled the shade along the fabric, pressing any bubbles out as I rolled.
 
 
Trim the fabric about 1/2 inch bigger than your shade.
 
 
Fold the cut edge under for a finished edge on the outside of the shade and hot glue it down (see the top of the picture where the fabric pattern doesn't match up).  Turn the trimmed edges to the inside of the shade using hot glue to keep it in place.  I hot glued ribbon inside the top and bottom edge of the shade to hide the unfinished fabric edge and make it look prettier. 
 
 
Secure the lamp shade back on your lamp and sit back and enjoy!
 
The funny thing...I really like the lamp base and the covered shade in the evening with the light on, but not so much during the daytime.  I'm thinking I might switch up some shades in my house and cover a different shade for this lamp base. 
 
Hey, it's only one more project to add to my always growing list...grin!

Friday, January 4, 2013

{Project 365} Day 4: Oops...Not the Picture I Intended


{Project365}: capturing this life - one photo (or so) every day for one year

Saturday, December 22, 2012

Vintage Sheet Blankie

For the past several years I've intended to make more effort to give handmade gifts.  I usually end up with only a few.  If I started those projects earlier than the week before Christmas, I'd surely be more successful!  Oh, well...
 
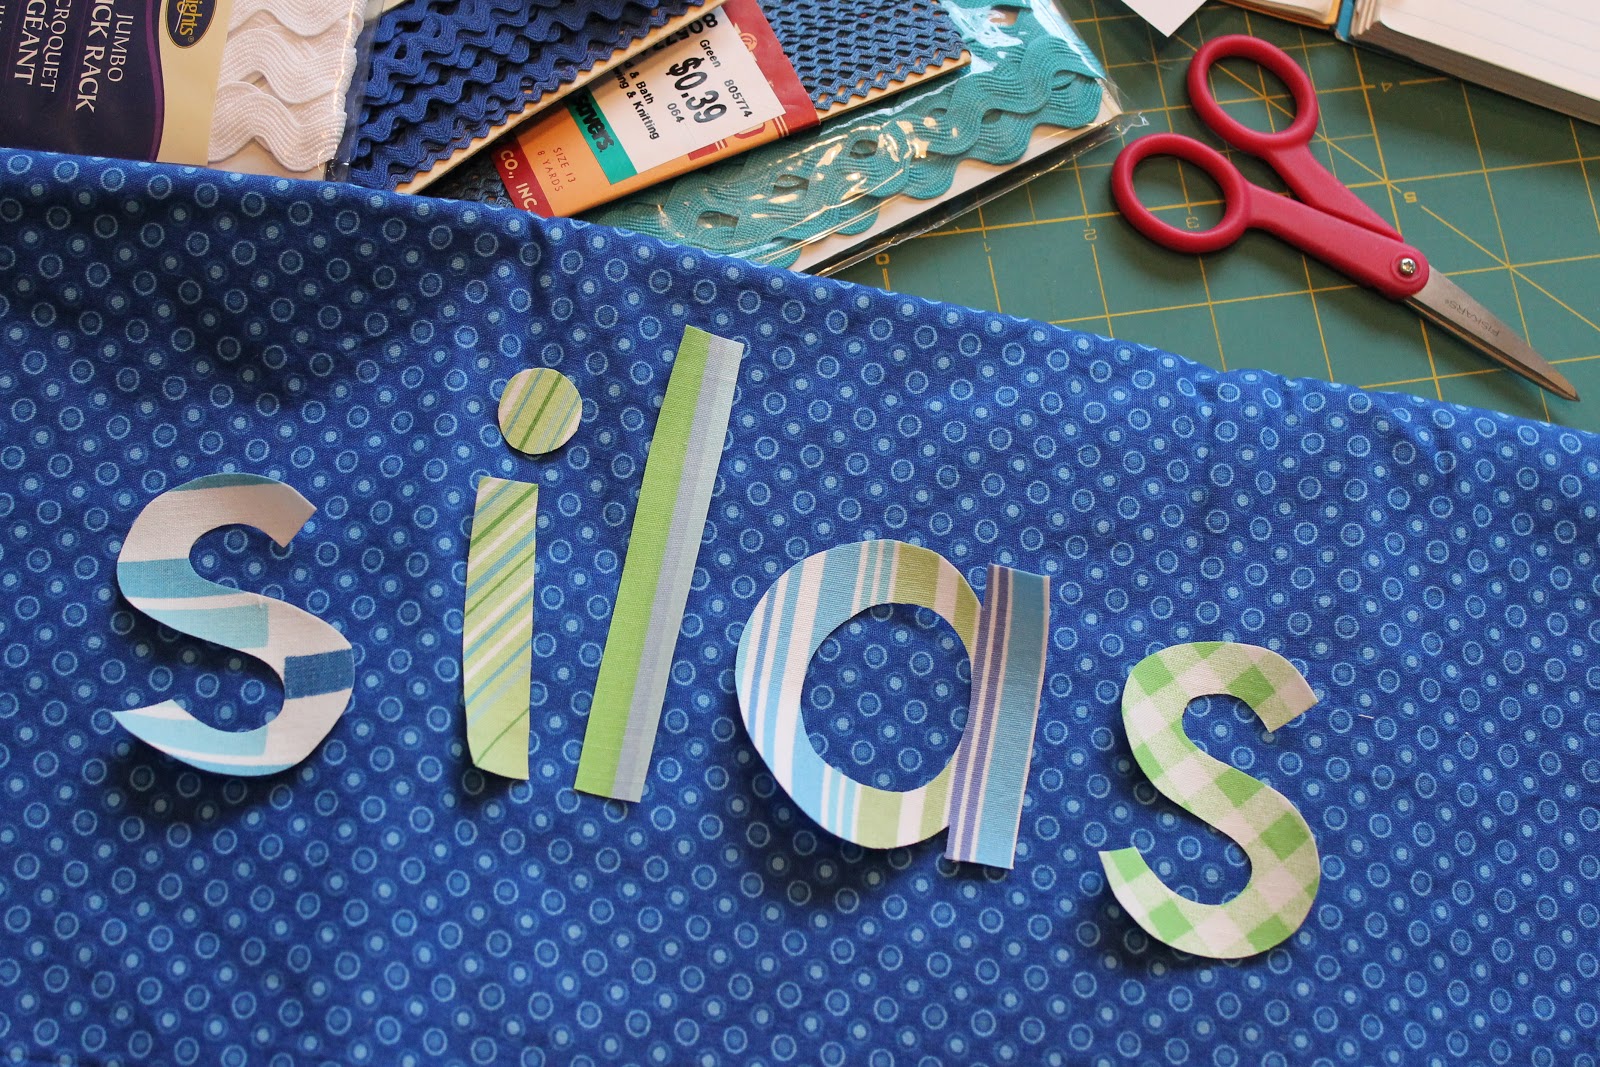
I have just one handmade gift to give and it's for my littlest man, Si-guy.  At least I have a "better" excuse this year...a 10 week old lovie boy.  And so, in true Kiley-Christmas-fashion, I thought of and started this project just two days ago.  I wasn't sure exactly what I would make but I've been dying to cut into my vintage sheet stash so I dug out blues and greens - but no florals!  My other goal was to use what I all ready had on hand...a "free" project!
 
 
I knew I wanted to put his name on the project.  I knew I wanted this project to be really special because, quite honestly, we aren't purchasing Christmas gifts for him this year.  I did pick up a like-new wooden bead toy for him at the thrift store but other than that he's going to simply enjoy the gift of love and snuggles from everyone.  Is that horrible?!
 

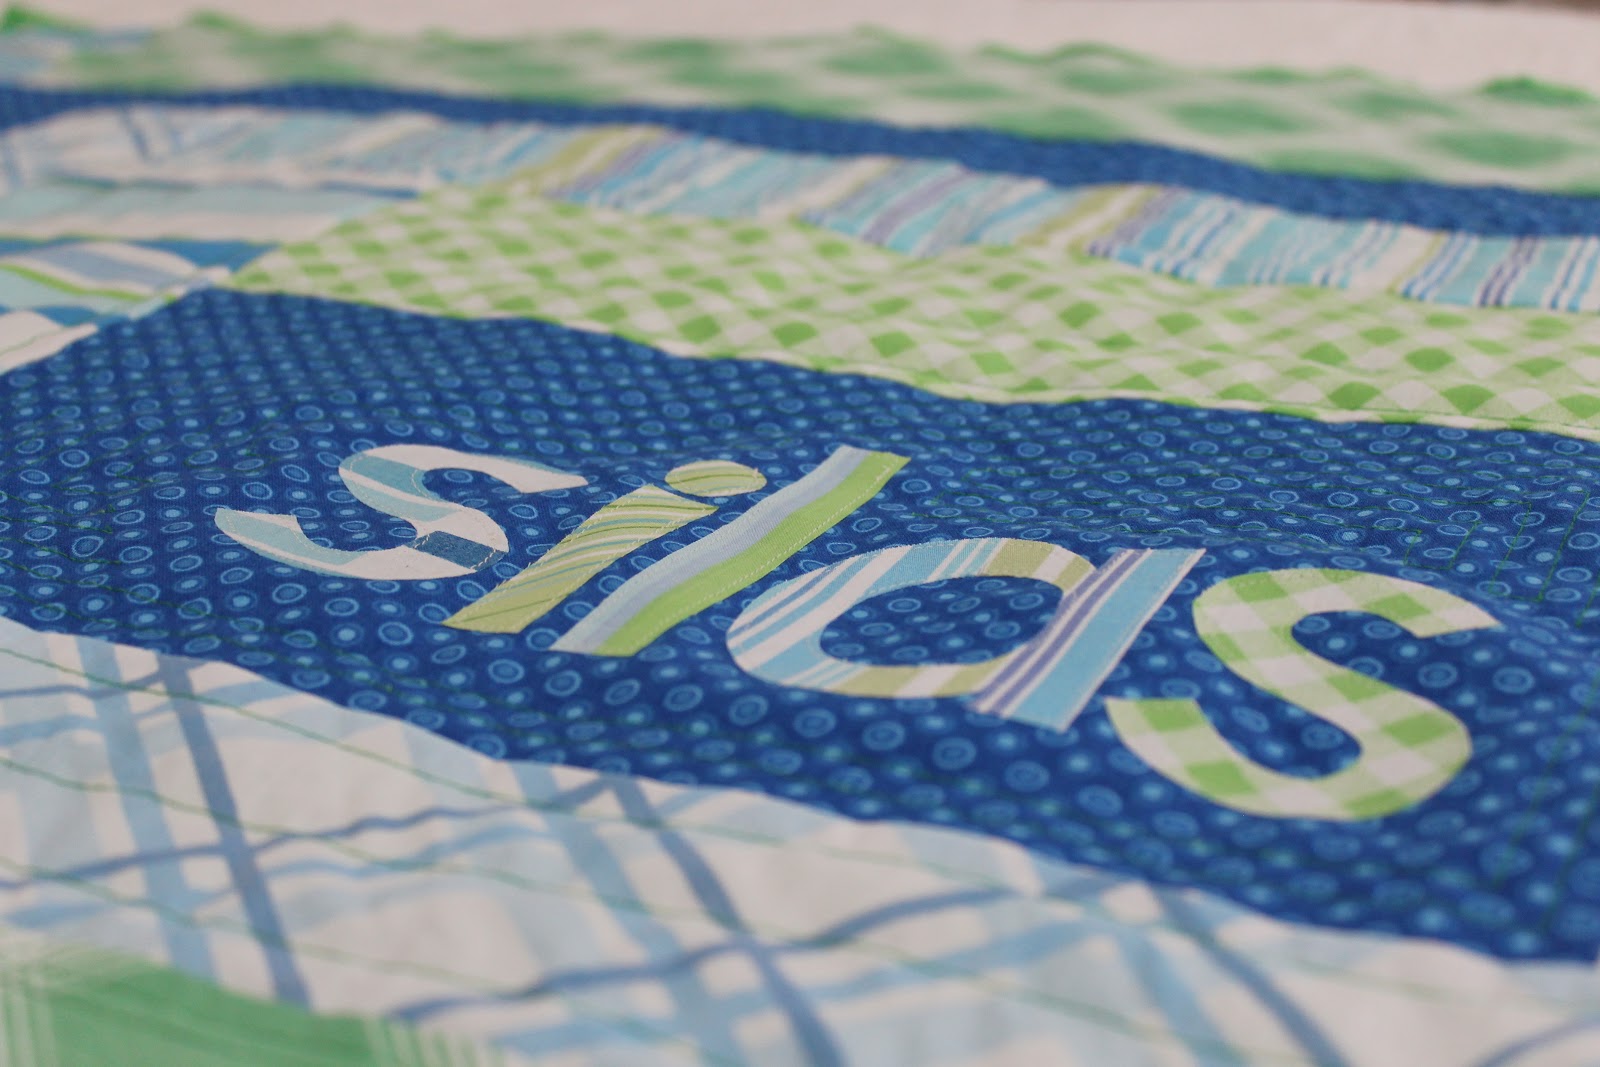
It turns out, once I got started, there was a soft snuggly blankie just dying to be created!  I LOVE it!!!  I choose a wonky (or liberated, if you prefer...) log cabin block.  I've never made this quilt block on this scale before.  It was quick and easy to piece together.  And, if you've read any of my other sewing posts, you know that I really prefer the creative process of not using a pattern.  I love figuring things out and seeing how projects evolve through the process - not being bound by the rules and restrictions of following patterns.


I completed the top and simply quilted minky dot fabric to the backside of the quilt top - no batting in between the layers.  It's light feeling, but still has some weight and warmth.  I cut the minky fabric about an inch bigger than the quilt top and in the end, decided to tuck and fold the minky over to the front as the binding after trimming it a bit.  A zig-zag stitch finished it off so nicely.  The edge is a bit "bumpy" due to the dots on the minky.  I would imagine plain minky would not create bumps like this.  Completing the binding this way probably saved me a day's work rather than adding a traditional quilt binding.  Easy peasy!


I used fusible web to attach his name with a simple straight stitch to tack it down permanently.  I assume the edges will fray a bit but I'm okay with that!


Won't these colors be so perfect for Silas' room makeover this winter?!  My color scheme is based on maps, globes, and vintage children's geography puzzles...


Hwin approves!  Silly kitty kept sneaking into my pictures!


I've been wanting to branch out a bit from my doll making and find a few new items to make and sell via etsy using vintage sheets...I might be onto something here!
 
Either way, I think I've got a great idea for handmade baby gifts in the future!
 
Christmas Blessings to you and yours!

Saturday, September 22, 2012

Rise & Shine

I've been busy working on some fun projects over the past few weeks.  Today, I finally paired together this sweet print from Katie Daisy, a vintage sheet, and a thrifted frame my awesome husband painted for me. (He was already painting our coffee table this color anyhow!  LOVE this yellow and LOVE my coffee table!  I should post a picture of that some time, huh?!)


So bright and cheerful!

 
To keep the fabric from shifting, I used tiny dots of hot glue at the very edge of the backing board and two small pieces of double stick tape to attach the print to the fabric.  With the fabric, the backing board fits quite snugly in the frame so I don't expect any of it to shift!
 
Can't wait to get it on the wall in our half bath along with some other items!


Sunday, January 8, 2012

Twenty-First Century American Thrift

We spent a lot of time getting boxes unpacked and areas of our house settled over Christmas break. It was a blessing to have Mike home with us for seventeen days. We accomplished so much!


As a result, I've gotten my sewing room/guest room mostly organized and there are many projects just waiting for me to finish them. I'm starting simple and with the most obvious ones. My goal for the next month or more is (1) to finish projects I already have waiting, (2) try to use items I already have on hand to finish a project rather than spending more money, and (3) don't purchase any other goods/materials for new projects until some current ones are complete.


This is absolutely do-able. It'll take some mental strength (to not visit the thrift store and be willing to say "no" to a good deal!), some "stick-to-it-tive-ness," and a few late nights when the house is quiet to focus. Plus, I'm not bogging myself down with doll orders at the moment so I should have some time...


First project: re-purpose thrifted frames to display some vintage feedsack fabrics


I completed this project late, late one night. The lighting was poor and I only took one picture of the identical frames as I found them at the thrift store. So imagine me ripping off the backing paper, pulling out the staples, removing the cutesy potted plants, and reassembling them using tape to hold my fabric in place behind the mat board openings! Oh, also, I was watching a Hallmark movie while doing this and got distracted many times...he, he!


Here they are hanging on the wall the next day in our "library" which is actually a lovely landing at the top of our stairs. After I reassembled the frames the night before, I was thinking that they might need to be painted. You can see a twinge of peachy color in the paint color. After looking at it all day, I decided it definitely needed a pop of color!

before


after
I love how they turned out! The fabrics look much more vibrant with the green frames.

I love the fact that no one else has the exact artwork I have on my walls...the beauty of decorating in Twenty-First Century American Thrift...(he, he!)

The colors also speak very strongly about my ideas for decorating our home. Gone are the days of trying to duplicate someone else's style or preference or trend. I'm embracing the freedom to use what I love, to go bold and daring, to eliminate perfectionism and the consequent piling up of unfinished projects, and to just be me...

...and these colors and fabrics are so me!

Monday, October 24, 2011

Garbage Can - The Quest

I've been searching for a garbage can...several, actually...since we moved. I keep resisting $10+ plastic ones I've found in my local stores for something with more character and less plastic. Even garbage cans can add to the decor in your room, right?!


With the exception of our kitchen garbage, all the others in our home are tall, circular wicker baskets that probably held fake trees once upon a time. I ended up finding a large popcorn tin - you know the ones you see all over the place at Christmastime - for the boy's room. It has an Americana feel to it...not exactly my favorite but the price was right at $.99 from the thrift store. I can always spray paint it if needed. The same day I found another tree basket, too, for $.99. Doesn't get any better than that!


Or does it?


Last week, I stopped in for a quick run through my favorite thrift store and guess what I found?! This vintage beauty for $1.79. Be still my heart! It's just right for my sewing room and it really is a garbage can in perfect condition...not even any gunk stuck on the inside bottom!!! Wahoo...I'm on a thrifting high!


The way I figure it, I just saved myself $26.23 on three garbage cans. And gained beauty with function. Now that's my way of decorating and living!!!

Friday, October 7, 2011

Teddy Bear Sleeping Bag

I saw a super cute sleeping bag for lovies on Pinterest (another new addiction! aaahhhhh!) and I just had to make one! You can purchase your own pattern from Flossie Teacakes, too! I'm definitely going to make more and have a dolly slumber party!


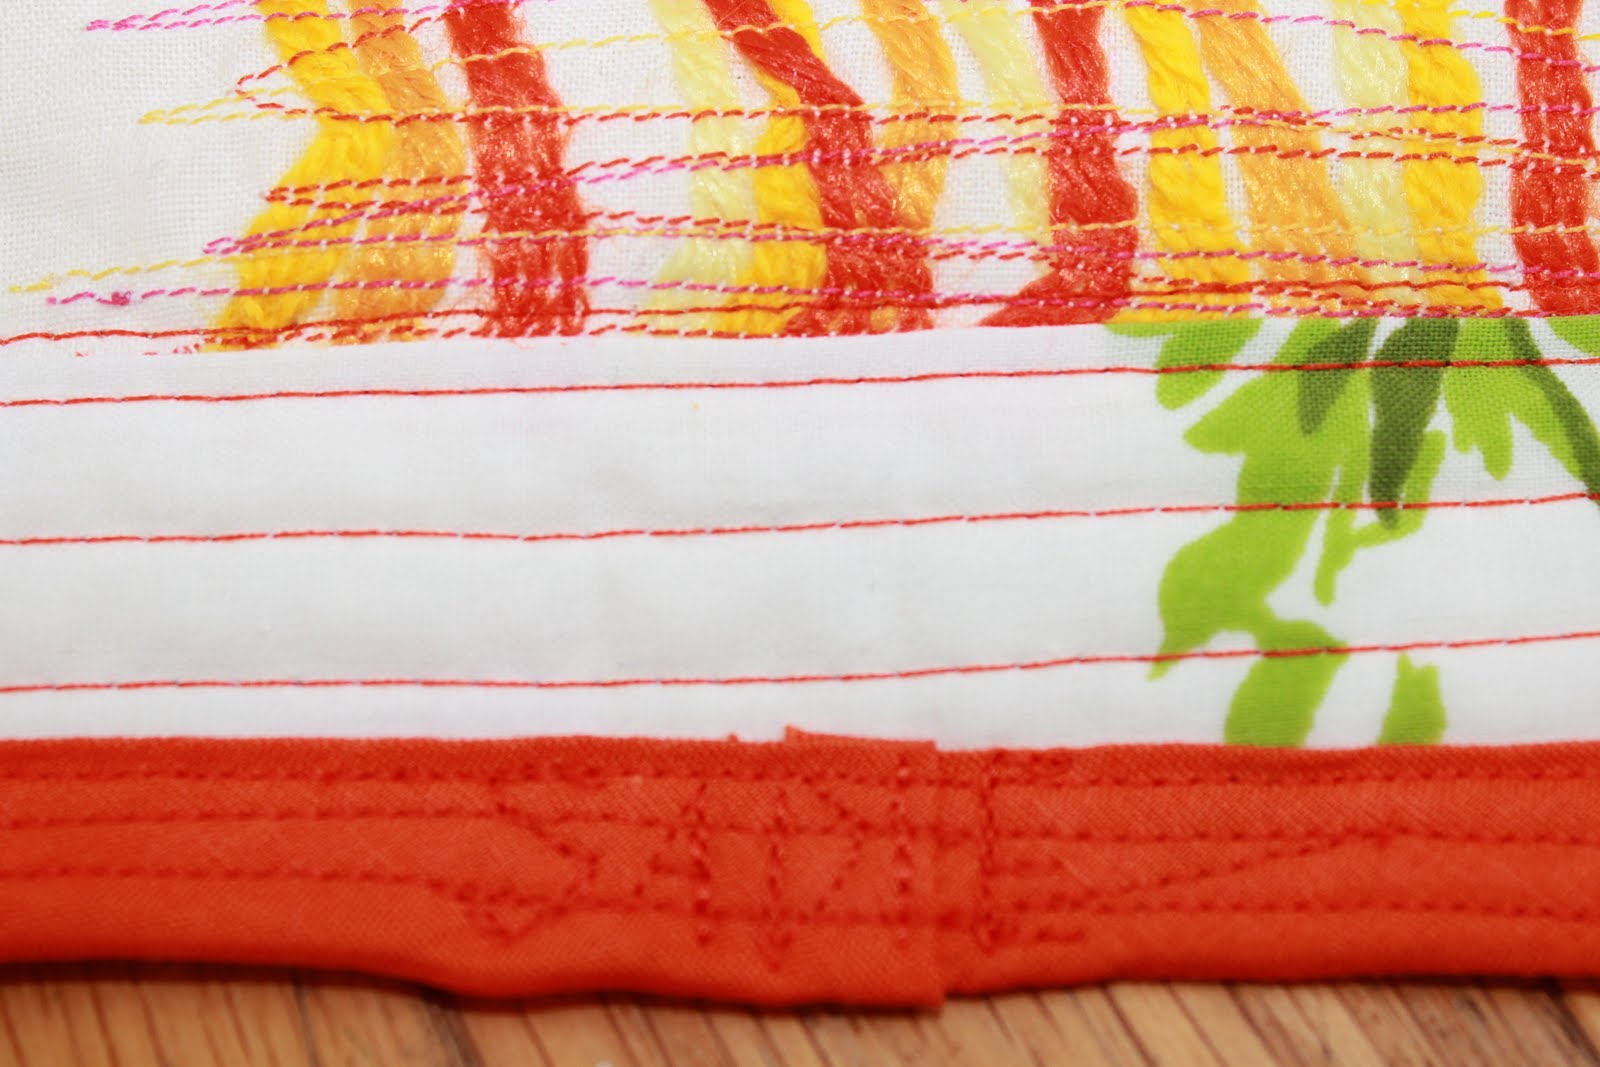
I saw this idea (guess where???) to sew lengths of yarn on a piece of fabric...thought it was kinda cool looking. I tried it with thrifted yarn on a scrap piece of muslin and it turned out pretty sweet. It was the perfect size to use on the sleeping bag cover...a small quilt block of sorts.


The rest of the fabrics came from my vintage sheet stash & scraps. The orange double fold binding was thrifted as well and not a little tricky...a LOT tricky...to curve around the rounded corners. Loving those bright, citrus colors! Who wouldn't wanna sleep in this fresh squeezed bedding?!


I tried to sew Sadie's name in the bottom of the sleeping bag...hmm...maybe next time I'd try hand embroidering it.


The finished sleeping bag. I made the daddy bear size (also included in the pattern is the baby bear and mama bear sizes.) Super fun!


Sometimes my mind needs a different creative break! This weekend I'll be focusing on getting more doll orders finished...amazed and up to my eyeballs in orders!

Monday, September 26, 2011

Vintage Treasure Hunt

I was so blessed by an opportunity to go treasure hunting with a dear friend who, like me, could spend days wading through antique shops for the perfect addition to her home. I think we're going to do this once a year...counting down the days already! Are you, friend?!

A few of the things I found: vintage floral hankies, floral print hung with vintage hanger, trio of vintage tins, quilt top handstitched with 30's-40's feed sack fabrics - perfectly lovely!!!, wooden sign...

Thursday, July 14, 2011

A Whole Lotta Cute for a Whole Lotta Nothin'

What do college friends and butterflies have in common? Nothing really unless you consider that one of my old college friends came for a visit and brought her butterfly punches with her.

Eight kids, six of them four and under. Two moms maintaining high hopes of crafting with said butterfly punches. Chaos along with fun. Laughter. Comfortable. Good times.

In between talking and caring for the kids, we did indeed find time to punch out our butterflies for this project. Just plain old hand powered punches by Martha Stewart (though she did bring her mother-in-law's Cricut...we were clueless! Ha!)

After my friend headed back home, while Sadie was napping, I grabbed a thrifted frame from my stash that was already painted white and started assembling my picture.

Side note: This type of project is the very reason I will be packing and moving all my unused frames and ugly dated pictures from the basement...not everything that is unused in storage should be eliminated!!! Mike, I'm taking my frames...grin!

I need to find spacers to go between the glass and the paper so the butterflies don't get smushed. I love it!!! Too bad it will have to be packed away until we get into our new house to be hung in Sadie's room.

This project cost me $0.00. I already owned the scrapbooking paper, glue strips, and frame!!! A whole lotta cute for a whole lotta nuthin'!!! But now I'm tempted to buy butterfly punches...


Inspiration photo here.

Thanks for bringing your gang here, Tarah! So fun to see you!!!

Monday, July 4, 2011

Thrifted Color

I'm not sure how wise it is for one to go to the thrift store to drop off unwanted items and since one is already at the thrift store to go inside to look for treasures...but that's how I roll! And, of course, treasures were there to be found!


I spotted this dresser over a month ago but at the time we were not selling or buying houses and I just didn't have space for it. Given that fact plus the $80 price tag, I walked away. But believe me, I kept thinking about that beauty!


Two weeks later I stopped at the store again. This time we knew we were buying a new house, but didn't have a buyer for our old house yet. In fact this was a trip to drop off items so I figured that Mike would be a little "put out" to say the least if I showed up at home with a new dresser. But the price was down to $40! Oh my...I almost caved!


Another week went by and by God's good grace, we had a buyer for our old home! So when I saw this lovely lady still waiting for me I snatched her up! Well, not really snatched because she's weighty...more like skip-ran to the checkout while dragging Sadie by the arm to buy her before someone else got the same idea! Would you believe I paid just $25 for her?! She is missing a few jewels on the front, but she's sturdy with lovely lines that will distress well once painted. Oh, our TV will be sitting pretty when we move to our new home!


Today's adventure brought in some colorful finds...


A pretty handmade apron made from upholstery weight fabric. It looks super sweet with my aqua blue sundress. I feel so June Cleaver-ish.


77 patches of knitted goodness and warmth bordered with green for $2.98...have I mentioned how much I'm in love with green recently?


I am.


Enamoured.


I've been watching for just the right blanket with a large mix of colors. Not too brown and orange. Not too clashy. I've had one pictured in my head with black borders. But oh, the green!!! This one is perfect! There are two little spots that need some repair in the "seams." (I know nothing about knitting or knitting terms, but it is obvious to me that I can make these two repairs on my own...maybe not "correctly" but repaired none the less.)

Finally, I found a bag of 100% crewel wool for $2.99. I'm not sure what I'll do with it or exactly what crewel embroidery is, but the colors were lovely and bright! At the very least, we can play around with it!


Color. Happy Sigh.

Saturday, July 2, 2011

Make Your Food Look Cute

A recent trip to the thrift store yielded me these rubber sealed, lidded, "quilted" glass jars. They are apparently old Planters peanut containers (and one Smuckers jar) with a picture of the peanut man on the tops of all the lids. One jar still had a label on it written, no doubt, by an older woman that told it's former contents..."oat bran opened Nov. 1994." There were still crumbs in the jar...eewwww!


I often use mason jars, rings, and lids to store food - things like chocolate chips, raisins, almonds, etc. in my cupboards. When I saw these jars for 99 cents each I had two thoughts...


1. I could use them for my food storage

2. I could use them for my sewing notions & craft supplies - buttons, ribbons, safety pins, pom-poms, etc.


Mike, clearly not as enamoured with the jars as I am, made sure that I knew they were just old junk jars and not "antique" jars. Okay...thanks, honey...I'm keeping them anyway because they're so cute!!! He, he! (He often doesn't "get" my love for thrifted things and yet there's been very little he's ever insisted is truly junk! He loves me THAT much!!!)


In the end, I used them for my food storage...but don't be surprised if they turn up in my sewing room in the future!


These jars even make my food look cute!!! (white chocolate chips, pecans, whole flax seed, coconut, mini chocolate chips - all potential granola bar ingredients)